YOU GET
10 YEAR'S WORKMANSHIP WARRANTY
REMOVAL & DISPOSAL OF OLD SHINGLES
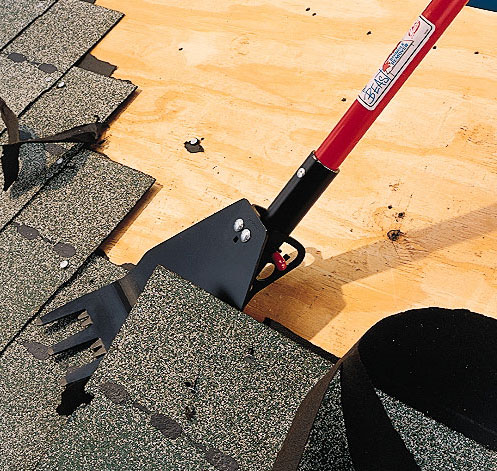 When deciding on a roof shingle disposal service, make sure you know what type of shingle you are
getting rid of and confirm that it is accepted by your disposal service.Asphalt shingles are the most
common for residential properties. Additional roofing materials include felt paper, wood, underlayment,
roofing gravel and flashing and trim. If your chimney did not leak before and you can use the old flashing
pieces as templates for the new, you should have no problems. However, if you have no
templates, you may want to call a professional roofer.
When deciding on a roof shingle disposal service, make sure you know what type of shingle you are
getting rid of and confirm that it is accepted by your disposal service.Asphalt shingles are the most
common for residential properties. Additional roofing materials include felt paper, wood, underlayment,
roofing gravel and flashing and trim. If your chimney did not leak before and you can use the old flashing
pieces as templates for the new, you should have no problems. However, if you have no
templates, you may want to call a professional roofer.
INSTALL NEW SHINGLES
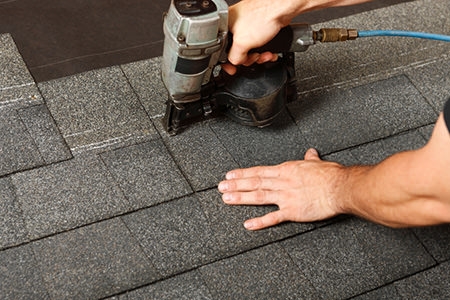 Work Left to Right, Bottom to top have a glance at any professional roofing crew in
action, and you'll notice the same pattern is always used. Begin at the bottom left
corner of a roof surface and work toward the right and upward from the eave line to
the peak. Where several workers are installing shingles, one usually begins by installing
shingles along the eave overhang, while others begin filling in the field, working from
bottom to top. In our recent strength tests on products from six manufacturers, we found
that the most costly type multilayered architectural shingles, typically with three to four
layers that overlap generally performs better overall than other styles.
Work Left to Right, Bottom to top have a glance at any professional roofing crew in
action, and you'll notice the same pattern is always used. Begin at the bottom left
corner of a roof surface and work toward the right and upward from the eave line to
the peak. Where several workers are installing shingles, one usually begins by installing
shingles along the eave overhang, while others begin filling in the field, working from
bottom to top. In our recent strength tests on products from six manufacturers, we found
that the most costly type multilayered architectural shingles, typically with three to four
layers that overlap generally performs better overall than other styles.
INSTALL METAL VALLEYS
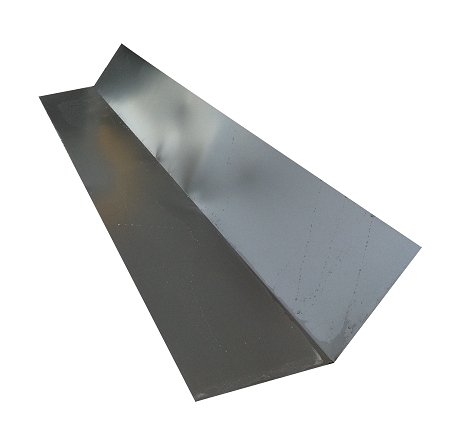 Protect your home against leaks with one of three ways to shingle a valley. We show
you how to do it yourself!
Three ways to roof valleys: open metal, closed-cut, and woven. All three work well,
but check which is preferred by your local building department. Regardless of the
method you choose, do not drive nails within 6 inches or so of the valley center or
you will provide an unwanted pathway for water.
A strip of waterproofing shingle underlayment, or WSU, provides extra protection and
is an essential component of woven and closed-cut valleys. It is also a good idea for
an open metal valley. Chimney flashing is fairly complicated.
Protect your home against leaks with one of three ways to shingle a valley. We show
you how to do it yourself!
Three ways to roof valleys: open metal, closed-cut, and woven. All three work well,
but check which is preferred by your local building department. Regardless of the
method you choose, do not drive nails within 6 inches or so of the valley center or
you will provide an unwanted pathway for water.
A strip of waterproofing shingle underlayment, or WSU, provides extra protection and
is an essential component of woven and closed-cut valleys. It is also a good idea for
an open metal valley. Chimney flashing is fairly complicated.
REPLACE ALL AIR VENTS
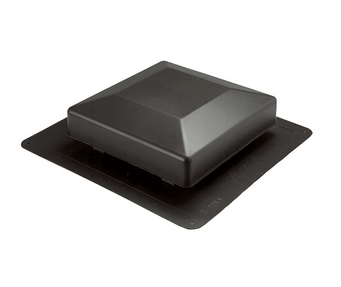 The first thing you need to do is remove the old vent covers. Take these off using
a screwdriver on the screws at either side of the panel. You can hold the cover on
with one hand while unscrewing with the other. Place the screws carefully to one side.
While you have the air vent cover off, take the opportunity to dust the space around the
vent. Take your new air vent cover in one hand, and place it over the gap where the old
cover was. Make sure that the screws line up. If the new cover has holes in a different
position, you will need to use a drill to make fresh space for your screws to fit into.
Holding the vent up with one hand, screw first one side, and then the other firmly to the
wall or ceiling.
The first thing you need to do is remove the old vent covers. Take these off using
a screwdriver on the screws at either side of the panel. You can hold the cover on
with one hand while unscrewing with the other. Place the screws carefully to one side.
While you have the air vent cover off, take the opportunity to dust the space around the
vent. Take your new air vent cover in one hand, and place it over the gap where the old
cover was. Make sure that the screws line up. If the new cover has holes in a different
position, you will need to use a drill to make fresh space for your screws to fit into.
Holding the vent up with one hand, screw first one side, and then the other firmly to the
wall or ceiling.
INSTALL PIPE FLASHING
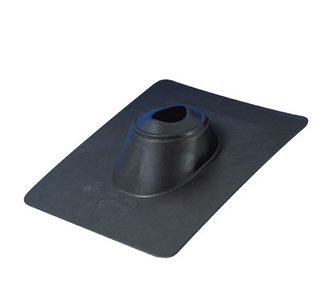 Shingle up to the roof penetration. Slide flashing over the vent pipe and secure with roofing nails. The lead pipe flashing should be at least 1.5" taller than the exposed vent pipe.
Roll the top of the lead pipe flashing into the vent pipe to create a long lasting water resistant seal that is finished in appearance.
Continue shingling above the vent pipe. Optional: apply roofing mastic to the top of the flange before installing upper side shingles.
Shingle up to the roof penetration. Slide flashing over the vent pipe and secure with roofing nails. The lead pipe flashing should be at least 1.5" taller than the exposed vent pipe.
Roll the top of the lead pipe flashing into the vent pipe to create a long lasting water resistant seal that is finished in appearance.
Continue shingling above the vent pipe. Optional: apply roofing mastic to the top of the flange before installing upper side shingles.
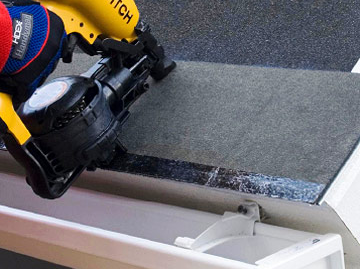
INSTALL ASPHALT FELT PAPER
 Extreme caution needs to be exercised when working on your shed roof and installing roofing felt paper. If not properly secured down to your shed roofing, accidents will occur while working on top of the felt paper. The following guidelines are general and you should always follow the manufacturers installation instructions located on the roll of felt paper you use.
Make sure your roof deck is clean and free of debris. If you are using drip edge (highly recommended) you will want to install it on your eaves first, and the rake edges after the paper is put down.
Starting from the bottom of your roof, roll the paper out going from edge to edge, leaving 1/2" overlap past the edges and trim.
Secure the paper in place with plastic capped roofing nails every 12" with the exception of doing the top edge.
Overlap the next layer of paper on the previous (following manufacturers directions), then secure this layer as you did the previous with your plastic capped roofing nails.
When you get up to the ridge of your shed roof, overlap the ridge with the paper.
Extreme caution needs to be exercised when working on your shed roof and installing roofing felt paper. If not properly secured down to your shed roofing, accidents will occur while working on top of the felt paper. The following guidelines are general and you should always follow the manufacturers installation instructions located on the roll of felt paper you use.
Make sure your roof deck is clean and free of debris. If you are using drip edge (highly recommended) you will want to install it on your eaves first, and the rake edges after the paper is put down.
Starting from the bottom of your roof, roll the paper out going from edge to edge, leaving 1/2" overlap past the edges and trim.
Secure the paper in place with plastic capped roofing nails every 12" with the exception of doing the top edge.
Overlap the next layer of paper on the previous (following manufacturers directions), then secure this layer as you did the previous with your plastic capped roofing nails.
When you get up to the ridge of your shed roof, overlap the ridge with the paper.
INSTALL STARTER SHINGLES
 Shingle Starter is self-sealing so when the shingles are installed, the membrane will seal around the nail to maintain this waterproof barrier. Another feature of ShingleStarter is that it comes with a unique sealing strip on top of the membrane.
Not only does ShingleStarter provide the necessary waterproofing protection, but it also eliminates all the costs associated with cutting shingle tabs for the starter course. Installing the peel-and-stick membrane could save the contractor up to 50% or more in installation time. By covering the roof in a faster fashion, the sooner the entire structure will be protected from the elements.
Shingle Starter is self-sealing so when the shingles are installed, the membrane will seal around the nail to maintain this waterproof barrier. Another feature of ShingleStarter is that it comes with a unique sealing strip on top of the membrane.
Not only does ShingleStarter provide the necessary waterproofing protection, but it also eliminates all the costs associated with cutting shingle tabs for the starter course. Installing the peel-and-stick membrane could save the contractor up to 50% or more in installation time. By covering the roof in a faster fashion, the sooner the entire structure will be protected from the elements.
1 FREE PLYWOOD CHANGE
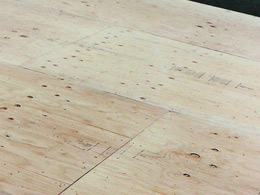 We provide free service to our precious clients for their services. If they choose
us for any wooden work and in that if they get any problem then we provide one time
plywood change. So that they get a chance for the service by this way they get a chance
to trust on us. We believe in quality and trust of our customers. Various customers came us
for the services and if they do not get 100% their service then they will never came back against
so we believe in customers satisfaction.
We provide free service to our precious clients for their services. If they choose
us for any wooden work and in that if they get any problem then we provide one time
plywood change. So that they get a chance for the service by this way they get a chance
to trust on us. We believe in quality and trust of our customers. Various customers came us
for the services and if they do not get 100% their service then they will never came back against
so we believe in customers satisfaction.
CLEAN EAVES-TROUGHS
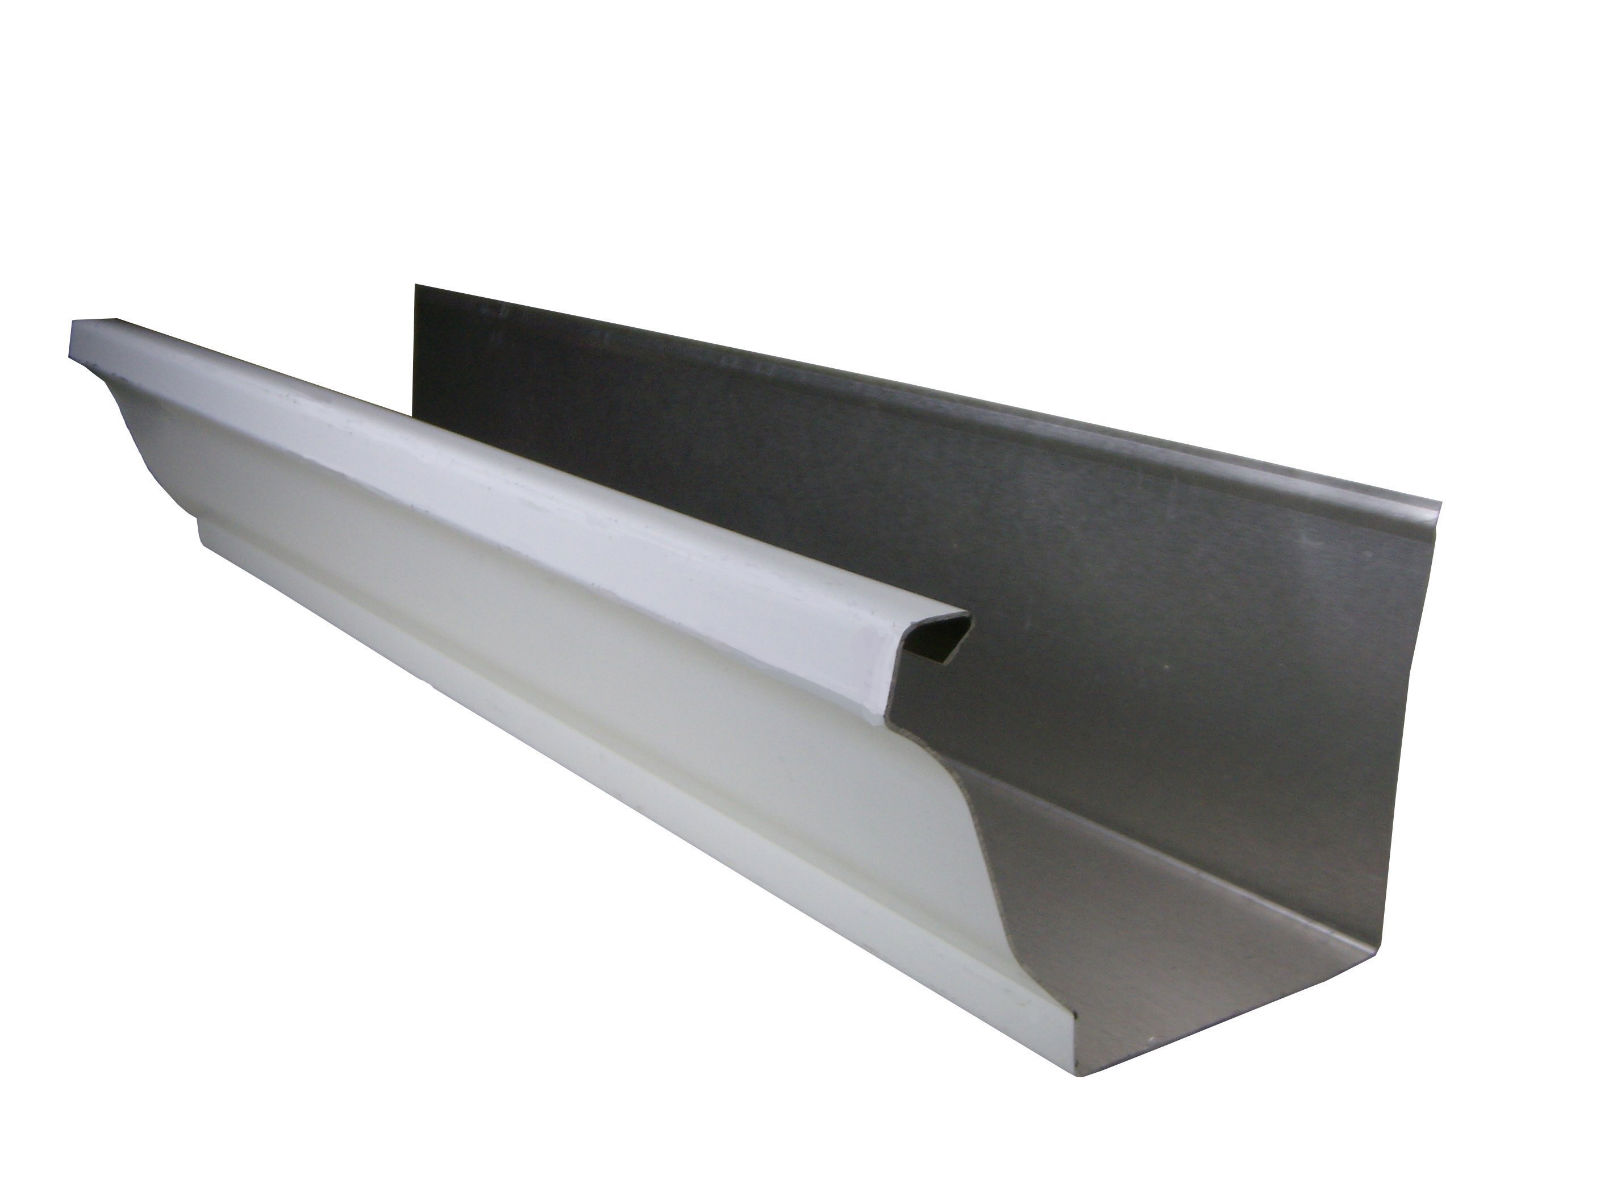 It might not be the cleanest part of the house, but your eavestrough is vital in keeping your home structurally sound and dry.
Eavestroughs are a safety device that divert water away from the roof of the house and into the ground.
As much as you’d like to think this isn’t the case, new houses actually aren’t immune to problems that can arise from eavestrough neglect. If the gutters are clogged with debris, the water will run down the house and start eroding the ground around the foundation or overwhelm the weeping tiles.
We’ve compiled some tips to help you stay dry under your new eavestroughs.
It might not be the cleanest part of the house, but your eavestrough is vital in keeping your home structurally sound and dry.
Eavestroughs are a safety device that divert water away from the roof of the house and into the ground.
As much as you’d like to think this isn’t the case, new houses actually aren’t immune to problems that can arise from eavestrough neglect. If the gutters are clogged with debris, the water will run down the house and start eroding the ground around the foundation or overwhelm the weeping tiles.
We’ve compiled some tips to help you stay dry under your new eavestroughs.
RUN MAGNETIC ROLLER
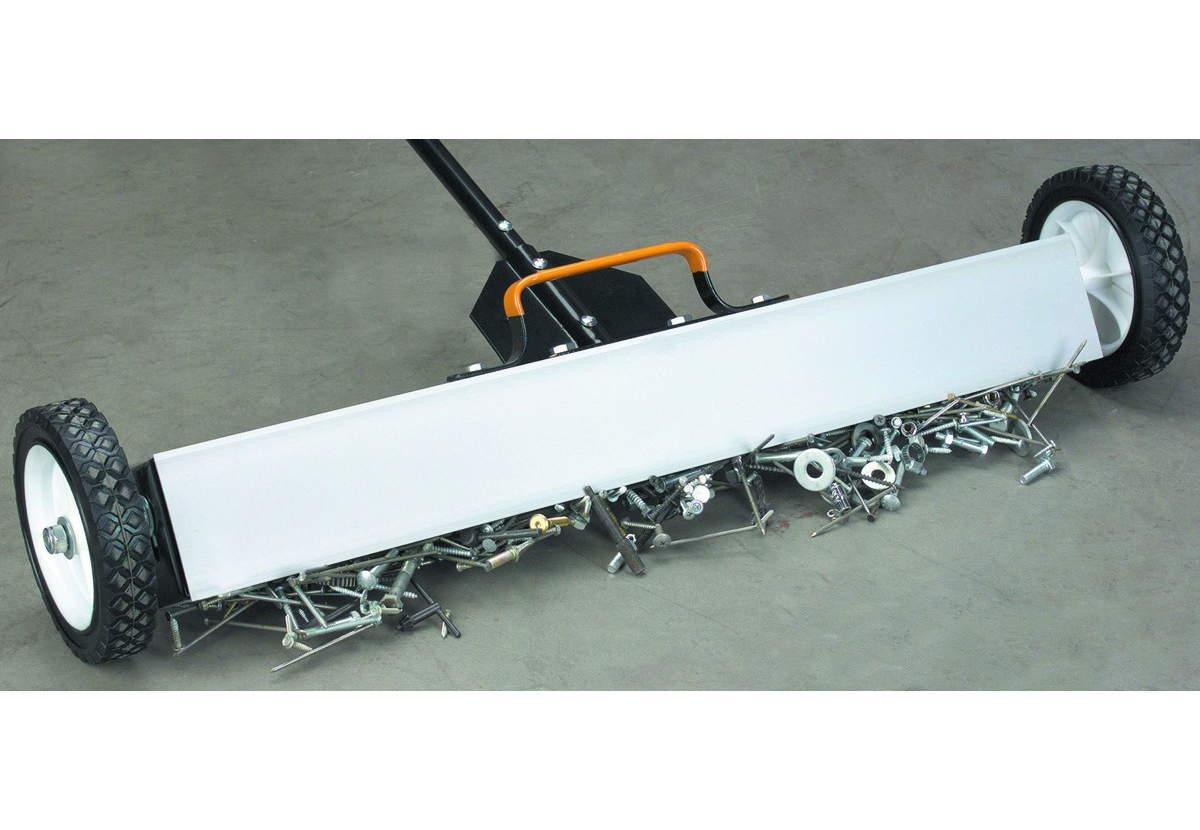 Magnetic Rollers are magnetized push brooms on wheels that can pick up metal waste (staples, nails, pins and other metal debris) inside and usually outside your home, as well.
They typically include a release button to easily dispose of the accumulated screws, nails and other metal debris in the home workshop, outdoors, or in machining warehouses.
Many buyers purchase them after contractors have finished a roofing job and negligently left a ton of metal debris in their lawn, endangering family pets, car tires, and the naked foot!
Luckily, a push-type magnetic floor sweeper can help you pick out all these sharp, metal bits. It may take a couple of rolling passes to get all the nails, but it's worth the effort to avoid an injured pet or a maimed foot.
Check out the comparison table below to compare widths- the Neiko has the widest broom head at 36" and the Master Magnetics the smallest at 14.5".
The Husky and Central Machinery magnetic sweepers are good for outdoor use, while the others are better suited to indoor sweeping.
Magnetic Rollers are magnetized push brooms on wheels that can pick up metal waste (staples, nails, pins and other metal debris) inside and usually outside your home, as well.
They typically include a release button to easily dispose of the accumulated screws, nails and other metal debris in the home workshop, outdoors, or in machining warehouses.
Many buyers purchase them after contractors have finished a roofing job and negligently left a ton of metal debris in their lawn, endangering family pets, car tires, and the naked foot!
Luckily, a push-type magnetic floor sweeper can help you pick out all these sharp, metal bits. It may take a couple of rolling passes to get all the nails, but it's worth the effort to avoid an injured pet or a maimed foot.
Check out the comparison table below to compare widths- the Neiko has the widest broom head at 36" and the Master Magnetics the smallest at 14.5".
The Husky and Central Machinery magnetic sweepers are good for outdoor use, while the others are better suited to indoor sweeping.